Sunday, January 26, 2014

Planking: Cedar Planked Salmon

Ah.. monday. Monday- aren't you my savior? How many of you have said 'okay on monday I am really ______' insert thing you regret from the weekend (consumption of pizza, waffles, cookies- what… am I the only one?) But we have to embrace monday, it is the start of the week, the previous 7 days don't matter all that matters is how you start your "new life" starting today- so its detox time! Well, not that intense, when I detox it is never with juices, its never EVER with raw foods, you will never see me eating a ricecake f..that..ish. Nah- I'm thinking lean foods that are rich in natural goodness- leafy greens, buttery delicious salmon, fruit, things that just nourish me naturally- without the crap. The whole mentality of detoxing drives me crazy, but i'll save that for a later post. Think about cleansing and redirect your thought process away from 'food as enemy' into 'food as fuel'- you don't need to shove it in your juicer in order for it to boost your body and your mind. This cedar planked salmon recipe is soooo easy. It's stupid. If you have a grill- awesome, if you don't- after significant research on your plank you can try this in the oven- however, my insurance doesn't cover your potential cluelessness so… do your research. The salmon is delicious and surprisingly rich, smokey yet sweet, you can't go wrong.

Maple-Mustard Cedar Planked Salmon (serves 2)
1 lb King Salmon (can use Wild Alaskan- it is just a little less flavorful)
1/4 cup pure maple syrup
2 tbs whole grain dijon mustard
2 tbs sharp dijon mustard
1 tbs orange juice
1 tsp salt
1 tsp freshly ground black pepper
1 cedar plank- soaked for atleast 2 hours

Step 1: In a small bowl, combing maple syrup, mustards, and orange juice, place in a plastic bag and place your salmon in the marinade- refrigerate for about 45 minutes.

Step 2: Preheat your grill- I keep it on a lower heat so there is less of a chance of overcooking the salmon and it gets a nice long smoke sesh. Pat the cedar plank dry, place the salmon on top, season with salt and pepper and place on the grill.

Step 3: Depending on the thickness of your cut of salmon, I would say, at the low heat, it should be between 20-30 minutes. Rule of thumb (literally): if you press the center of the salmon and there's no spring back, its not done, you want just firm to the press. The good news: aim to undercook… microwave= your friend--> ya can't uncook an overcooked piece of fish- nah mean?


ENJOY!

Saturday, January 25, 2014

Pantry Pasta Done Right!

I just LOVE when I do not have to leave my house to go to the grocery store just so I can make the night's dinner- I love even more when it turns out to be incredible. If you live on the east coast, or happen to turn on the news, you will know that we are currently trapped inside a 'polar vortex' aka its freakin cold as balls. Sorry for the profanity, but it is. I could only manage to get outside in todays snow to go get lunch, other than that- I'm homeward bound, which I can't even deny that I love. So when it came to figuring out dinner on a saturday night, surrounded by great places to eat, I took a better look at what I had already to see if I could take some weight out of my freezer and pantry. Hm… lets see here- I've got: frozen shrimp, a can of chopped clams, garlic, shallots, pernod (fennel flavored liquer)… ding ding ding… seafood pasta? Yes please. It's saturday night, ya damn skippy i'm feelin' a little naughty- I think i'll give myself a food spanking. Ya know, it may seem like I've been cooking a little naughty lately but ya know what, it's OKAY, salmon recipe on the way tomorrow! I didn't even need to leave the house- winning! The best thing about this is all you have to do is go put these things in your pantry: Pernod, frozen shrimp, canned chopped clams- the rest is as easy as onions, garlic, and some butter- simplicity at its finest. For real.

Pantry-Seafood Spaghetti

1/2 lb cooked spaghetti (salt the water! cook al-dente, about 7-8 minutes)
2 tbs olive oil
2 large shallots, chopped
4 cloves minced garlic
1/2 cup Pernod
1 can chopped clams
3 tbs unsalted butter
1 lb shrimp- peeled and deveined, chopped into bite size chunks
1 1/2 tsp salt
1 tsp freshly ground black pepper

Step 1: preheat a skillet with the olive oil on medium heat, add your shallots and sauté for about 4 minutes stirring frequently until translucent, add your garlic and stir until light golden color, about 2 minutes.

Step 2: Add your Pernod, bring to a boil and then add your clams in their juices and butter. Take it down to a simmer and add your shrimp- season with salt and pepper and add your shrimp. Crank the heat up a bit, keep tossing the shrimp in the sauce until just turned pink- should not take more than 4-5 minutes!


 Step 3: Add your strained pasta to the pan, toss to coat, season with a little salt and pepper- and serve! I mean… restaurant quality seafood pasta, and you didn't even have to go to the market. ENJOY!


Wednesday, January 22, 2014

C is for cooookie

It's snowing- it is dumping snow- I'm stuck inside yet again except this time it's 3 pm- welp I can't make lunch- it's too early to make dinner… maybe just a snack… just… one…cookie. Yea i'm a fitness trainer, yea I'm going to school to be a dietitian- but like I said from the get-go, I'm not one of those 'girls who posts photos of food they dont eat' - hate that ish. I EAT. And I love cookies. cookies. Cookies. cookies. For years I could not make chocolate chip cookies from scratch. Why? Who knows. They fell flat, they were dry, whyyy. Finally, one day, I crafted a recipe that actually…worked. EUREKA! This has been simultaneously the best and the worst thing that has ever happened to me. Best because I can whip up chocolate chip cookies that are amazing in literally 5 minutes. The worst well… I don't have to spell it out for you.

Chocolate Chip Cookies
3/4 cup (1 1/2 sticks) unsalted butter melted and cooled slightly
1/2 cup cane sugar
1 cup light brown sugar
1 whole egg plus 1 egg yolk
2 tsp fine vanilla extract
2 cups all purpose flour
1/2 tsp salt
1/2 tsp baking soda
1 cup semi-sweet chocolate chips

Step 1: In a large bowl, combine your cane and light brown sugar, with a hand mixer add in your melted and cooled butter until combined. Add in your egg and egg yolk and beat together, then add your vanilla extract.


Step 2: In a separate bowl combine flour, baking soda, and salt and whisk to combine. Add the dry ingredients into the wet, and mix until just the little bits of flour are gone and the ingredients are evenly incorporated. Stir in your chocolate chips.


Step 3: PUT IN THE FRIDGE. I'm sorry! But if you shove it in the oven those cookies are going to be flat buttery messes- let the fats solidify through some cooling and you'll guarantee the perfect cookie. After about 2 hours (SORRY!) Preheat your oven to 350 degrees fahrenheit. Check out your oven- is it crappy- most likely- know your hot spots and if your oven scorches food easily keep an eye on the cookies and move them around (from one rack to the other etc). Place several spoonfuls of dough on a parchment lined baking sheet. Pop in oven- about 10 minutes.
They are caramel-y ooey, delicious, almost butterscotch like in flavor but a tride and true chocolate. chip.cookie. You're welcome and… i'm sorry?


Thursday, January 16, 2014

Hearty Pastas: Worth the 'Weight'

Even though pesto is generally delicious, it can become one note after a while. Same thing goes for pasta dishes, its not just red sauce or butter anymore- pasta can become a template for a ton of flavor because in essence most pasta is flavorless. The problem with pasta from a dietary standpoint is it leaves you temporarily stuffed, and then starving later- it doesn't keep you full. Mostly, pasta has little to no nutritional value- our body basically breaks it down into glucose and fats- so we really don't NEED it- and thats why in most cases it carries empty calories. Whole wheat/brown rice/spelt pastas have been blowing up your local grocery aisle and theres a reason why. We are worried here about digestability and nutrient value- these 'healthy' versions provide a slightly better alternative then your refined and processed pastas BUT let's not get carried away here- 98% of the time pasta is not a meal. Our problem is that we gorge on a bowl of carb when really our portion size should really be more like a palmful. The gluten-free pasta options, i'm sorry to say, taste gluten-free- some things just cannot be helped- but any alternative for this delicious pasta dish works because the grainy texture- which I personally love- is hidden by the red pepper pesto which will happily make you forget its not the 'real thing'. This is one of my all time favorite pasta dishes I make- its got chicken for protein, roasted asparagus for some green, little chunks of smoked mozzarella- its delicious.

Whole Wheat Penne w/ Chicken, Smoked Mozzarella, Asparagus, and Roasted Red Pepper Pesto
1/2 lb whole wheat penne (cooked as per box instructions)
2 roasted red bell peppers (char on all sides, seal in plastic bag for 5 minutes, peel/seed/slice)
1 bunch fresh basil
1/4 cup toasted pine nuts
1 clove peeled garlic
1/3 cup grated parmesan cheese
1/3 cup extra virgin olive oil
1 tsp salt
1 tsp freshly ground black pepper
1 bunch asparagus, chopped into bite size pieces (make sure to trim an inch from the bottom first)
2 grilled chicken breasts
1/4 cup cubed smoked mozzarella (can find at Italian specialty stores or Whole Foods)

Step 1: In a food processor combine roasted red peppers, basil, pine nuts, parmesan cheese, garlic clove, salt and pepper- pulse to combine- drizzle in olive oil (make sure to scrape sides)- set aside
Step 2: Chop the asparagus into 1/2 inch pieces, place on a sheet pan lined with foil or parchment paper, drizzle with olive oil- sprinkle with salt and pepper and roast in a 400 degree oven for about 7 minutes just until bright green.
Step 3: Cook pasta to al dente (make sure to salt your water) If you need me to tell you how to make pasta we are in trouble- just follow the box instructions and test the pasta to make sure its still got a slight snap to it. Toss the pasta with the pesto and the mozzarella and serve with grilled chicken-sliced.
Nowadays you can buy your grilled chicken- but if you have a grill- just simply season with olive oil, salt and pepper, throw on for about 4 minutes each side. Leftovers make a killer pasta salad!
ENJOY!

Tuesday, January 14, 2014

Bison- the Mike Tyson of Protein

Bison? Yes, bison- don't be scared- there's nothing scary about it, consider it your leanest meanest beef substitute. Nowadays ground bison can be found at farmer's markets and at your local Whole Foods, if you have seen it you will notice just how red it is- which means… little to no fat. Bison is an incredible source of protein, it's flavor is so similar to beef you can hardly tell any difference and it is so 'skinny' it can fuel you up without the fat slowing down your blood flow to your heart. However, because FAT IS FLAVOR bison needs a little help in the flavor department, moreso than beef. You can buy all different cuts but today we are making bison…burgers. Some crispy onions, tangy BBQ sauce and low-fat swiss cheese on a brioche bun- yes…please.

Bison Burgers (makes 2 big guys)
1 lb ground bison
2 cloves garlic, minced
1/2 spanish onion, minced
1 tbsp sharp dijon mustard
4 dashes worchestire sauce
1 1/2 tsp salt
1 1/2 tsp freshly ground black pepper

Step 1: Combine ingredients in a bowl, mix thoroughly, form into large patties and season each side with salt and pepper


Step 2: Preheat grill, cook for about 5 minutes on each side until cooked through (a good tip is to feel the burger, if it doesn't bounce back and sinks its still raw on the inside- you are looking for a nice spring back) Add cheese about 3 minutes into the flipped side until melted.
Crispy Onions
(other half) of Spanish onion- sliced
1 red onion, sliced
2 tbs olive oil

Step 1: In a saute pan on low heat, add the oil, add the onions and, stirring frequently, saute the onions until cooked through about 10 minutes- then crank the heat up a tiny bit and get some good color for about 2 minutes. 
Make your burger- I love adding my favorite BBQ sauce- crispy onions, and a toasted bun (hint: I only toast the bottoms so I get some soft bread and some crunchy) ENJOY!


Sunday, January 12, 2014

Brunchin' hard: Buttamilk Pancaykes

Ah... the weekend, remember the days in college when there was nothing BUT the weekend? Wednesday night was saturday and thursday morning was sunday brunch- (sigh). Now that we are big kids, the weekend actually carries meaning- maybe we aren't working... maybe we are... but every sunday that rolls around this little critter inside of me (probably my unborn food baby) says... brrrrunch....brrrrunch... feed me things you will regret tomorrow... Well for me, today means get up- put on my comfy sweatpants- and study for the week ahead. If you didn't know already I am a graduate student studying dietetics- so while today I will be revisiting carbohydrate metabolism for my macronutrient metabolism class- I will start with my own 'visit' to carbo-land... PAN-CAKES. Pancakes- so simple- and yet- so daunting. For years I could not crank out fresh pancakes, or chocolate chip cookies, luckily for me (not so much for ma waistline) I mastered them both in due time.

If you are yet to own and renovate your home, as about 98% of MY readers have yet to do so because we are young and independently un-wealthy, you know that renting means an unpredictable stove. Most ovens and stoves I have seen in my short 8 years of renting have been so OFF that when I get to cook at my parents house its like being in a professional kitchen. The only thing this means is we have got to test our shit, ie: do a sample pancake so that one side doesn't look like a black tire and the other one is raw. Its not you... its your shitty equipment that we pay an obscene amount in rent to use.

This pancake recipe is delicious, simple, it tastes like how all pancakes should taste... fluffy yet slightly cakey, hints of vanilla, and doused in syrup because I am a five year old- you know how us elves do (thats an Elf reference, and if you don't know it then just GET OFF OF HERE!) kidding. Are these low-cal- not particularly no, but I always find i'd rather know whats going into my brunch then waiting in a ridiculously long line in the city to get fed something maybe as-good but doused in fat and crap that leaves me feeling like I need a 3 hour power nap. In time I will develop a recipe for healthy pancakes that doesn't taste like wallpaper paste but I will not put anything half-assed on here.

Buddamilk Pancakes
2 cups all purpose flour
1/3 cup cane sugar (can use regular- I just like the bit of caramel flavor from the cane)
1/2 tsp fine kosher salt
1/2 tsp baking soda
2 1/4 tsp baking powder
1/2 stick (4 tbs) melted unsalted butter, at room temperature
2 cups fat-free buttermilk
2 eggs
1 tsp vanilla extract

Step 1: Melt your butter and set it aside. In a bowl- measure and combine flour, sugar, salt, baking soda, and baking powder whisk together.

Here's our foster dog Jack! Anxiously awaiting a morsel of p-cake...
Step 2: In another bowl, combine the buttermilk, vanilla extract, eggs, and whisk to combine (PLEASE REMEMBER: WET measuring cups are different from DRY measuring cups- pictured is a WET measuring cup, the stackable measuring cups are DRY) Then, add your butter- for here, don't worry if it gets a little lumpy- if your making a souffle- that might be a problem- but your good for p-cakes.


Step 3: Preheat a (preferably nonstick) skillet on medium heat. Add the wet mixture into the dry, and stir just until theres no more dry specks- do not overmix! Batter should be lumpy- not like my or your ass because we are not going to eat like we're never having another meal. In batches place 1/3 cup batter in pan (about 1 or 2 at a time). Keep an eye on them if you have a crappy stovetop with uneven heat distribution. About 3 minutes each side- until golden brown. If the worst case scenario is they aren't totally done, pop them in the oven at 350 for 5 minutes. 

Douse with your favorite surrup (syrup) and ENJOY! Happy Sunday everyone!

Wednesday, January 8, 2014

Gettin' Lamby

I love getting lamby- turtley- mushy- these are all terms that I use to describe being super comfy and toasty- you don't have to understand it- it just is. Tonight I literally got-lamby- I woke up this morning before the day's work in my comfy pjs and made this dish, it is a total slow-cooker superstar but I just do the real thing and cook it in a (giggle) dutch oven and just keep an eye on it. The only thing I can say about my Moroccan lamb tagine recipe with carrot salad is... that it's just ridiculous. No seriously it is ridiculous. It's delicious and it is one of those dishes I can't believe I actually crafted. Don't be intimated by the recipe list or process- it is a one pot, easy bowl of incredibleness. It truly warms you from your inside-out; the mixture of spices with acidic tomato and sweet succulent honey paired with the bite of the carrot salad- add in some whole wheat pita and transport me to Marrakech because it is just as good. This process of creating fall apart delicious lamb- or any protein- is called braising- you are basically submerging the protein in flavorful liquid cooking the meat past well done so the muscle fibers break down and become this delicious moist morsel of heaven. Almost anyone cannot f- this up. Almost.

Morrocan Lamb Tagine

2 lbs lamb cubes (can be stew meat, can be cut up boneless leg of lamb- make sure they trim the fat)
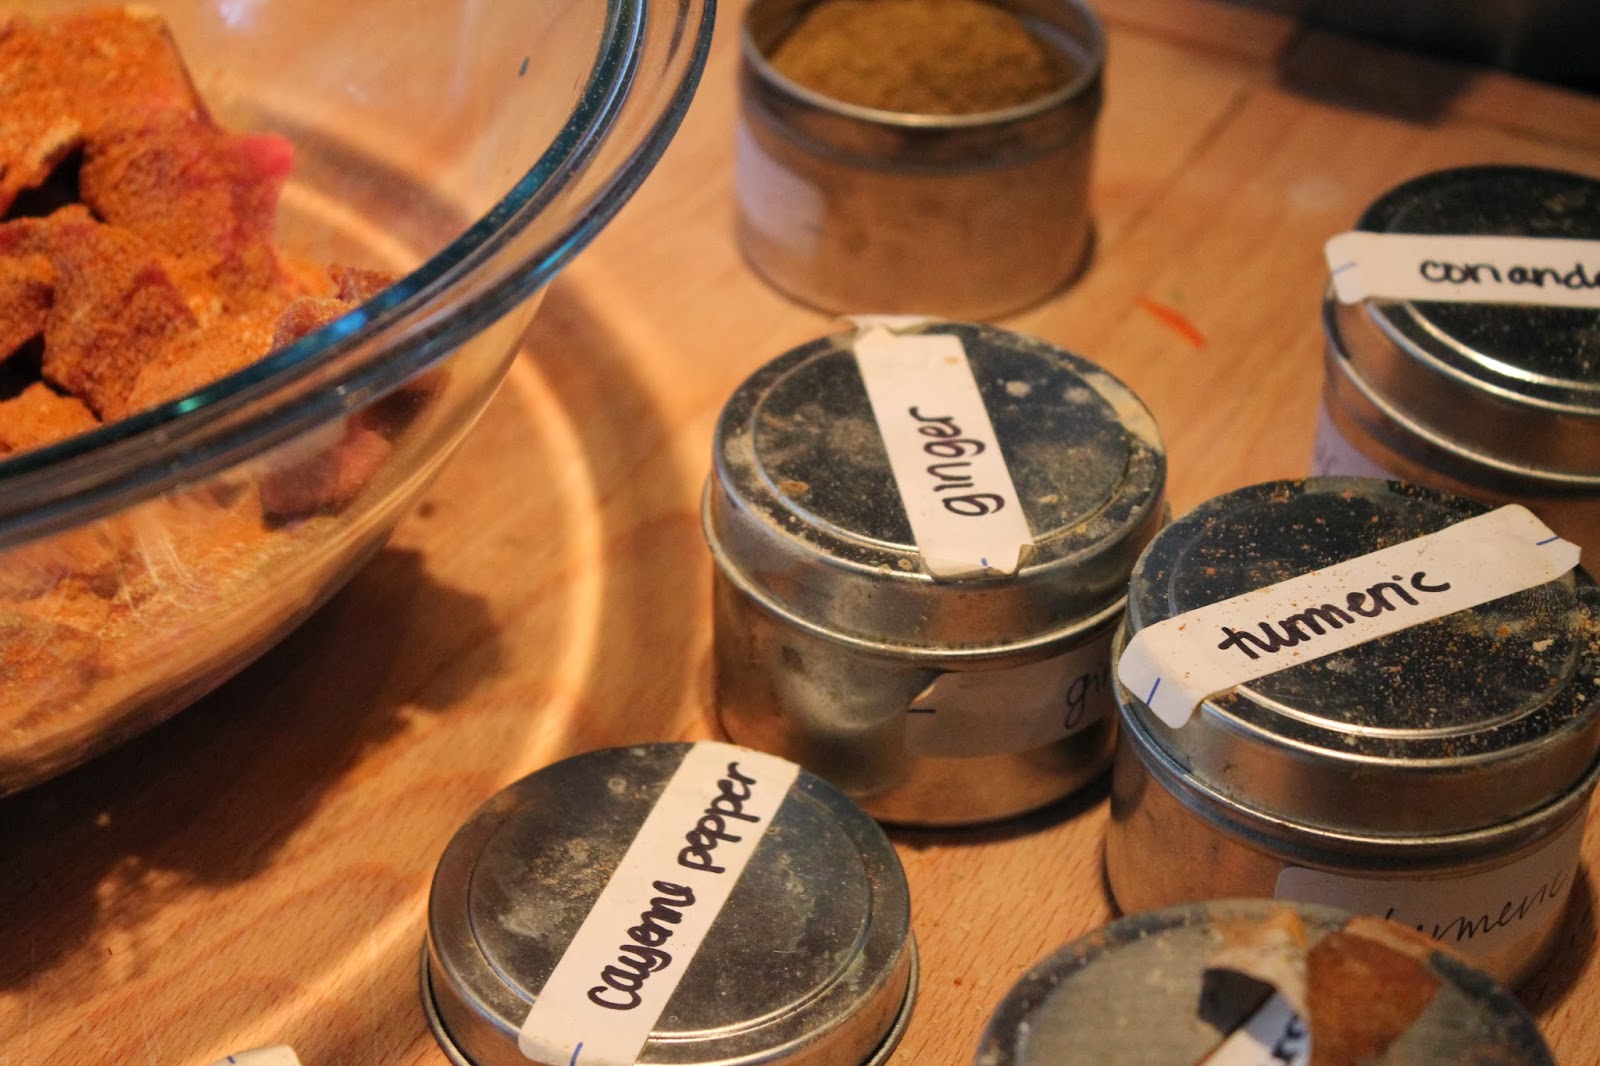
2 tbs ground cinnamon
2 tbs cumin
1 tbs cayenne pepper
2 tsp turmeric 
1 tsp ground ginger
2 tsp kosher salt
2 tsp ground black pepper
1 yellow onion, diced
1 tbs tomato paste
1- 14 oz can diced tomatoes
1- 14 oz can crushed tomatoes
10 halved pitted, dried dates
1/4 cup peeled whole almonds (I use marcona which have some flavor to them but any kind will work)
1 qt low sodium chicken stock
1/4 cup honey
1 cinnamon stick
1 oz- diced dried apricots
sliced almonds for garnish

Step 1: Preheat your dutch oven on medium-high heat and coat the bottom with grapeseed oil. Combine cinnamon, cumin, cayenne, turmeric, ginger, salt and pepper in a bowl. Add lamb to the bowl and mix to coat


Step 2: In batches, brown the lamb on two sides, and set aside in a bowl. Reduce the heat to medium- low heat, hit the pan with a touch more oil- and add the onions- sweat for about 2 minutes, then add your tomato paste, stir for a minute more, then add your tomatoes and the lamb and any yummy juices that accumulated in the bowl. 

Step 3: Throw in the almonds, dates, honey and cinnamon stick. Add your stock - bring mixture to a boil and then to a simmer- keep the heat low and with a slanted lid (slightly open) let it go for about 2-3 hours, stirring occasionally.

Do you see the foot in my tagine- those are my almonds- talk about art.
 Step 4: Add chopped apricot- top with slivered almonds- tell me that doesn't look ridiculous.
Words cannot describe
Moroccan Carrot Salad
6 large carrots, peeled, and grated
1 tbs harissa (Moroccan spice blend- can find at Whole Foods- also unreal with hummus)
1 lemon- squeezed
1/4 cup olive oil
2 tbs chopped flat leaf parlsey
1 handful raisins
salt & pepper

Step 1: Peel and shred your carrots. Place in a salad bowl.
Step 2: Combine harissa, olive oil, lemon juice, salt and pepper in a bowl, add parlsey and raisins to carrots and toss to coat with dressing. Serve!
Serve some couscous or pita with this dish and you cannot go wrong- a little effort goes so far, and there will definitely be leftovers to munch on through the week. Trust me- you don't want to miss this. Happy snuggling!
This is really what I cook in- not even gonna play.

ENJOY!

Tuesday, January 7, 2014

These are a few of my favvvorite things...

...Like the song... I sing these combos in my head daily... what's for dinner? Try (in order of cooking) some of my greatest low-cal cooking combos that are usually sitting in your kitchen cabinet or in your fridge. If you possess these items, you can (I shall help you) figure out dinner that doesnt require microwaving. If this wets your culinary appetite, my absolute favorite non-cooking cookbook, The Flavor Bible, will change your foodie language and mentality forever. It's the best.

P.S. always remember to spank your food with S&P- salt and pepper- just don't go crazy- balance not flavor!

1. olive oil, shallot, garlic, lemon zest, lemon juice, white wine, chicken stock (or veggie)
Great with: chicken, shrimp, shellfish, pasta

2. sesame oil, ginger, garlic, low sodium tamari (can sub with low-sodium soy sauce), mirin, rice wine vinegar
Great with: salmon, shrimp, chicken, veggies

3. olive oil, red pepper flakes, yellow onion, garlic, white wine, canned diced tomatoes
Great with: shellfish, pasta, white fish, chicken

4. dijon mustard, whole grain dijon mustard, maple syrup, orange zest, orange juice, olive oil
Great with: salmon (bake or broil) chicken (marinate and bake or grill)

5. garlic, shallot, dijon mustard, red wine vinegar, lemon juice, olive oil
Great with: salads (as a vinaigrette), chicken (marinate and grill), shrimp (marinate and saute or grill)

Stay tuned for the best proportions (please do not pour equal parts of all of these into a bowl, mix, and hope for happiness- there are methods to the madness) in which to create deliciousness.

ENJOY!


Sunday, January 5, 2014

Sunday Peetzuh

Here in Philly there really are not as many pizza options as I would like. Yes NYC you have us beat on bagels and pizza- maybe we might be a less obese population because of it (however we do pick up the cheesesteak so i'd imagine its a wash). What we DO have here are artisanal, brick-oven pizzerias that have been sprouting out of the woodwork for the past 5 years. Lucky for me, one of the most popular brick oven pizza joints around, Nomad Pizza, has just opened down the street. Since the snow has now turned into ice and walking three blocks looks more like my first time on ice-skates this seemed like the perfect option. The crust is thin and smokey, their hot soppressata pizza is my absolute go to. House cured soppressata- sliced to perfection- crispy on the edges, sweetened with drizzled honey and baked to utter heaven= happy sunday tummy. If these pictures don't get you hungry then you have no food genitals.


Saturday, January 4, 2014

The green that made the team

Get your mind out of the gutter. I mean mustard greens- not any other inedible type- this is a kid friendly blog. So the inspiration behind this incredible dip came from the desire to make something my preggo girlfriend with potentially undesirable glucose levels could enjoy carb-free. I needed a snack that she could eat and not miss the bread. Dips...dips... I just feel like dips are so lackluster. I'm bored. How can I juj (thats ju-uhjz for you non Yiddish speakers) up this whole dip thing. Let's try mustard greens, spicy and delicious- imagine kale with the bite of a radish- lets get some really good PASTEURIZED cheeses- one soft, one sharp- to melt inside the dip- no breadcrumbs for the top? How about toasted pine nuts? Can I get an a-men?

Greenie Cheesy Dip:

1 bunch mustard greens- chopped finely, then rinsed THOROUGHLY- those things are filled with sand
3 cloves garlic- minced
3 shallots- minced
1/2 tsp kosher salt
1/2 tsp ground black pepper
4 oz fat-free (or light) cream cheese, softened
4 oz nonfat greek yogurt
2 oz soft goat cheese (or any tangy cheese you prefer)
2 oz grated sharp cow's milk cheese (think sharp cheddar)
1/2 cup toasted pine nuts, pulsed into crumbs


Step 1: preheat the oven to 400 degrees fahrenheit. Preheat a medium skillet on moderate heat, add 2 tablespoons of olive oil, add shallots and saute for 3 minutes. Add the garlic and mix in with spoon until lightly golden, about 1 minute. Add in your mustard greens, season with salt and pepper, and cook down until soft, about 3-4 minutes. Put in separate bowl and squeeze excess water out with paper towels.


Step 2: In the bowl with the mustard green mixture, add your cheeses- give it a good mix.


Step 3: To toast pine nuts- in a dry pan on medium heat add the pine nuts, give them a little stir after a minute- DO NOT STEP AWAY- even the most skilled cook upon slight distraction has burnt pine nuts- as soon as they have a nice nutty color- you're set. Add them to a food processor and pulse until they form tiny crumbs. Add the mustard green mixture to a serving dish that can go in the oven- sprinkle with pine nut crumbs.

Step 4: Pop this baby in the oven- about 12-15 minutes until you get those yummy bubbles. Serve with sliced peppers, cucumbers, carrots, or some nice crunchy crackers. What football game?


 ENJOY!