Tuesday, June 17, 2014

Summertime Softshell Crabbies

Yep, its officially summer. I know this because its 91 degrees and muggy as hell in the city- walking around for about 2 minutes until you hit a sweat and then its all hell breaks loose. What gets me through these drenching city summer days? Thats right, soft-shell crabs. These little suckers are super nostalgic for me, one of two dishes my father ever made us growing up- the other one? homemade potato chips… go figure. The season for soft-shell crabs is here as fast as its gone, basically they are young crabs whose shells have yet to harden, and they are entirely edible and majorly delectable. If you are smart enough to keep an eye out for them, they never disappoint. Many restaurants batter them and deep fry them- thats a NO on so many levels. Softshell crabs are delicate, and juicy... why am I frying that? No thankya. If you have never had soft-shell crabs, this recipe is a great way to break em in. Lightly coated in seasoned flour and sautéed to perfection. They don't even need a sauce, thats how juicy they are. Ugh now I'm starving… ready…set...CRABS (hah I couldn't help myself) Lets eat.

Sauteed Softshell Crabs (recipe for 2 people, about 3 crabs each)
6 softshell crabs- from a REPUTABLE source, as goes for all seafood- ask them to clean them.
2 cups all purpose flour
1 tbs freshly ground black pepper
2 tbs Old Bay seasoning
1 tbs garlic salt
1 tsp finely ground kosher salt
Approx. 1/3 cup olive oil (for the pan to sauté crabs)

Step 1: Set a large pan on medium- high heat and add enough olive oil to coat. Prepare your seasoned flour: add flour, pepper, old bay, garlic salt, kosher salt and stir to evenly combine. It seems like a lot, but this is all the seasoning they are going to get, so make sure you can TASTE the seasoning in the flour alone.


Step 2: Lightly dredge your crabs in the seasoned flour, pat off any excess, and place them in the oiled pan. I say no more than 3 at a time. Cook for about 3 minutes on each side, just until the crabs are firm to the touch and turn a nice nearly red color. After the first batch, add enough oil to coat the pan and continue with the last three. Watch for splatters!


Step 3: Lightly pat with paper towels, and serve these babies!


ENJOY!

Sunday, May 11, 2014

Mothers Day Frittata Muffs

Eggs man. Eggs are tough. You either are REALLY into eggs, or your like… MEH- I'd rather have a pancake. From a dietetic standpoint, eggs really are the way to go. They are jam packed with nutrients, protein, and most importantly they keep you full a hell of a lot longer than yogurt or the bready good stuff. As with all things, for me to enjoy eggs they have to pack a punch, so these frittata muffins are a great venue to add seasonal yum-yums that liven up ye good ol' egg. I made these for mother's day and all of my mommys (aunts, grandmothers, etc) went gaga for them. I love to mix up the elements of the frittata components- a little smoked mozzarella, grilled corn and zucchini, roasted cherry tomatoes for that bright acidity component, and some fresh basil- they are phe-nom. phenom. You can stick them in your freezer and microwave them at work, easy peasy yaweezy? (like- ya with me?) Alright, lets get cookin'.

Summer Harvest Frittata Muffins
8 eggs
1 cup milk (any kind)
1 tsp salt
1 tsp freshly ground black pepper
1 zucchini, halved and grilled- cut into 1/4 inch pieces
1 ear corn, grilled- corn removed from the cob
1/2 cup cherry tomatoes, roasted (400f- toss in a little olive oil, 10 minutes until they start to shrivel)
1/2 cup cubed smoked mozzarella (about 1/2 inch pieces- a nice chunk)
1 bunch basil, thinly sliced

Note: I have a jumbo muffin tin- 6 muffins per batch- that fits exactly for this recipe. You can go smaller- you can pour it in a dish- just watch it when you cook. Smaller= less cook time, Big dish= longer cook time.

Step 1: Preheat your oven to 375 degrees fahrenheit. Line your muffin tins (jumbo liners you can definitely find at whole foods.) Combine eggs, milk, salt and pepper and whisk to combine.

Step 2: Prep your veggies. Make sure you sprinkle the zucchini, corn, and tomatoes with a little salt and pepper. 


Step 3: Place the egg mix in the muffin liners, then add your veggies- I put 4 pieces of zucchini, 2 chunks of mozzarella, 3-4 roasted tomatoes, and a tablespoon or so of corn (add it last or else it goes right to the bottom) top with the basil.

Step 4: Pop in the oven, about 15 minutes until they set.


Not only are they freakin' beautiful- they are delicious- and HEALTHY. Anyone yelling at me about yolks or a little mozzarella can go scratch. ENJOY!


Friday, May 2, 2014

Chicka, Chicka yeauhh.

Guys, you guys, do I start with an apology? I'm sorry… i'm sorry! It's been a minute since I've posted a little cash-meeyuh because, well, this little slice of the world i've got is not for me to throw anything I feel like on it. I could never do that to you! Eating something outside of perfection? Something I haven't  personally put my stamp on as amazing? No, no NO! I couldn't, I wouldn't, and I shan't! The past month we have had a couple of struggles (I mean me and my kitchen.) School work, passover (yes that is a struggle), and general frustration has sent me really thinking about my food staples and why I cook at all. To be real, I cook for FLAVOR- I do, I'm not gonna lie- if you hand me a bowl of quinoa with olive oil and some arugula I will smile (graciously) and put it outside for the birds. All of the food I eat, and present here, has got to have flavor, big enough to satisfy someone like me- who eats real food in the real world (not in a pasture.) I am a big believer in whole nutritious foods- yes that includes red meat, it even includes (wait for it) BUTTER! Yes, butter- a little butter can go a long way. Why do we look at butter and wave a red flag? Well, because like all things we are presented with in the beautiful U.S. of A. we like to drown our food in it. Nah, son. Thats not how we do it in my kitchen. On a rainy, dreary night, after a beautiful glimpse of spring, I took out my local whole chicken I had put in the freezer earlier in the week- and dreamt about a rainy night, a roasted chicken, and a girl, and that girl… was me!

Herb Roasted Chicken
1, 3 1/2 lb whole chicken (giblets removed)
1/2 stick unsalted butter, at room temperature (can pop in microwave 10 seconds and you're good)
1/3 cup extra virgin olive oil
1 head of garlic (reserve 1-2 cloves)
zest of 1 lemon
1 palmful (eyeball it) flat leaf parsley
2 tbs fresh oregano leaves (reserve leftover with stems)
2 tbs fresh marjoram leaves  (reserve leftover with stems)
2 tbs fresh thyme leaves (can substitute for 1 tbs dried thyme- reserve leftover with stems)
salt and pepper to taste

note: You can pick any herbs you have on hand- oddly these are what were in my fridge that were fresh. You can halve the amount and substitute dried, you can also add in rosemary or replace it with one of the herbs listed- you can have whatever you liiiike. Traditionally, you would use kitchen twine to ensure even cooking/browning- ya know what, I just didn't feel like doing it, and I can guarantee 90% of you don't even own kitchen twine, so let's just leave it out for now.

Step 1: Preheat the oven to 425 degrees fahrenheit. In a food processor combine butter, olive oil, zest, herbs and 1-2 cloves of garlic and pulse until pureed into what we call a 'compound butter'- set aside


Note: If you have any aromatics in the fridge (celery/carrots/onion) chop em up and put them in the bottom of your roasting dish. You will notice here, because I am a child, that I do not have a proper roasting pan- it was lost long ago- so I improvise! If you don't have the aromatics NO BIG DEAL. 

Step 2: Slice the lemon you zested in half, stick it inside the cavity of the chicken, along with the rest of the head of garlic, and as many of your herb leaves as you have left (need about a handful of each.) Grab your butter and get to shmearin- on the surface of the chicken and you can even get a little creative and stick some under the skin over the breast. You will not use all of your butter- just enough to coat. Season with salt and pepper.


Step 3: Place your chicken in the oven on the center rack. Cook for 45 minutes, depending on the size of your chicken, may take longer/shorter- a way to test is to cut where the leg meets the breast and if the juices run clear- you're good!


Every 15 minutes give your chicken a little love brush with some of the compound butter- again, nothing crazy, just a little brushin'
and then….


Step 4: Let this baby rest- reserve those juices, for about 10 minutes, slice and serve. I added some unreal local yams I roasted, and sautéed dandelion greens
 (can you tell i've started my farm share yet :-P )


It's rustic, beautiful, and honestly its just f*cking delicious. That is all.
ENJOY!

Tuesday, April 1, 2014

Spank-yo-kopita. Spinach Smiles and Feta Dreams

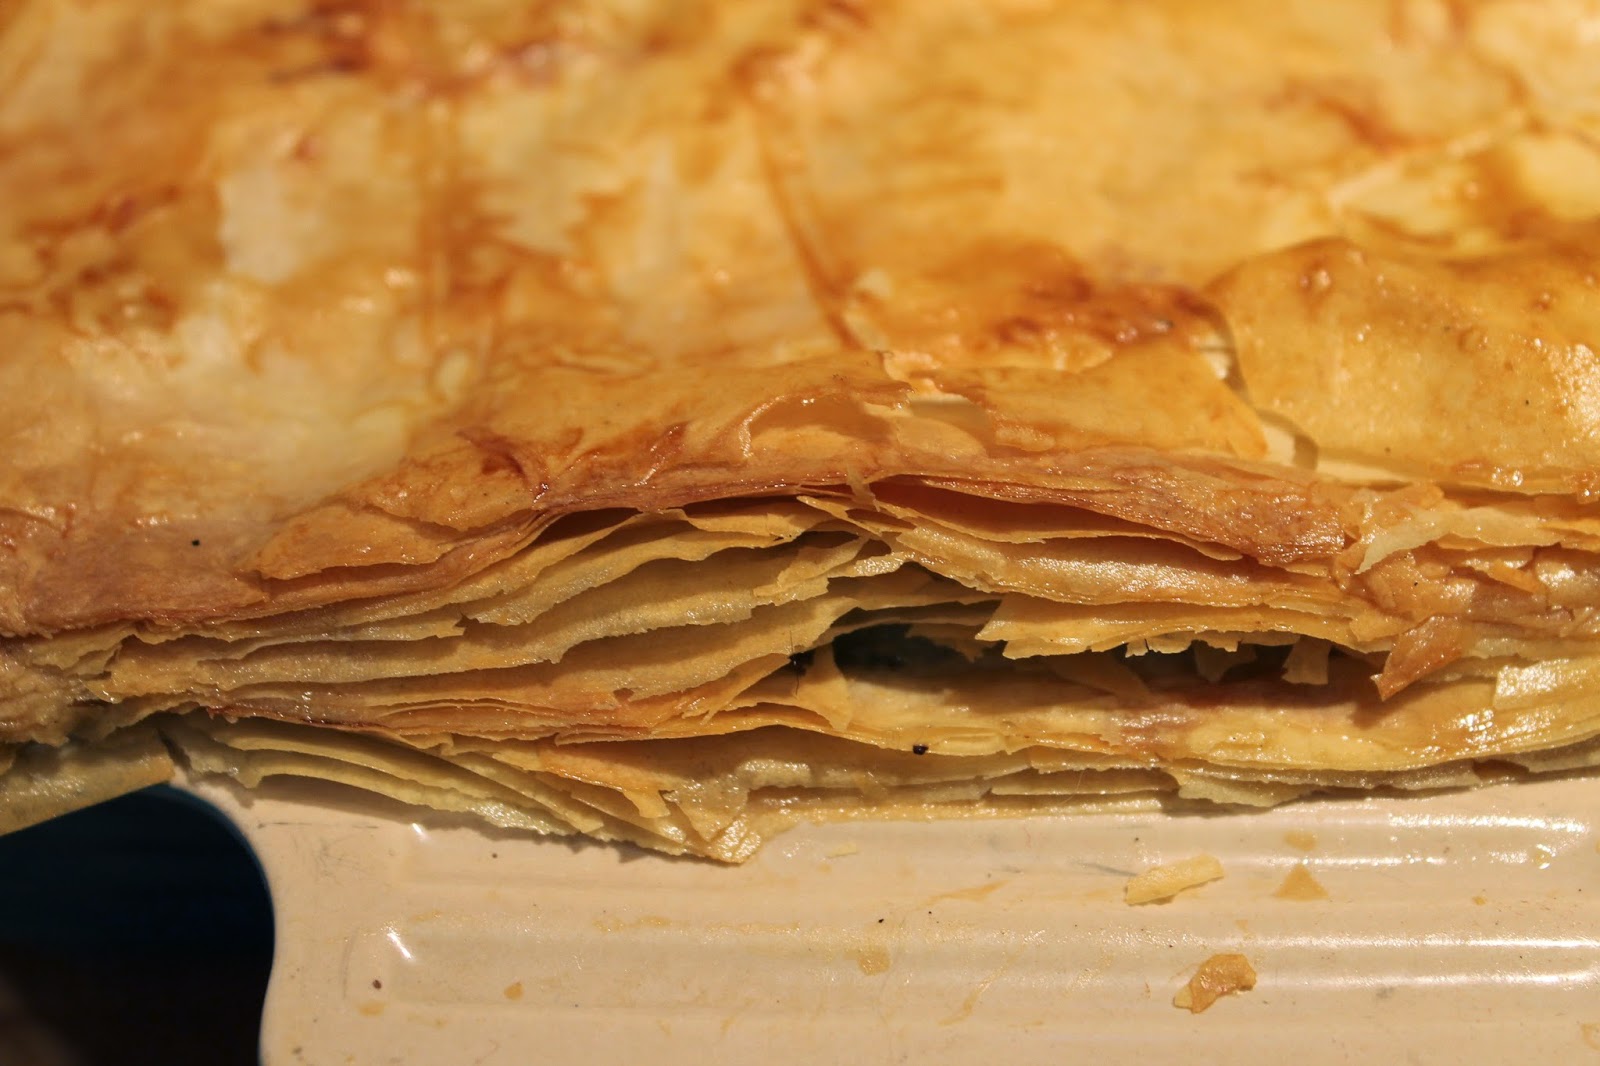
One of the many reasons I started cooking can be summed up in this single story. On a night in late Spring, I was frantically running around my kitchen preparing my "famous" chicken kebabs and my equally famous version of spanakopita, trying to impress my very foodie guests coming to stay for the weekend. Aaron's cousin and his wife were coming in from NYC and I was dead-set on making a culinary impression. Really, my kebabs were to be the star, I par-grilled them, and as they got settled, stuck them on warm in the oven. Well of course I got completely wrapped up in conversation and forgot to take the kebabs out of the oven, and I nearly CHOKED on my first bite of chicken. That is how dry that chicken was. SUCH an amateur mistake. Adam, Aaron's cousin, kept on chewing even though I KNEW they were inedible. Finally I forced everyone to admit my failure, and we sat around and picked at my successful spinach pie dish and munched on greek salad, laughing at my own jokes of self-defeat. Sadly, Adam left this earth not too long after that visit, but I will always remember his smiling eyes trying to choke down a piece of sandpaper chicken across the table from me. It's the great memories like that that make me smile every time I make this dish. It's a bit of work, but totally worth it.   Filled with antioxidant-rich swiss chard, kale, and spinach, with that cheesy creamy tang from the yogurt and feta, buttery and flaky layers of phyllo dough- its a winner.

Spanakopita
2 leeks, chopped and rinsed
4 cloves garlic, minced
1 lb fresh spinach
1 bunch swiss chard, chopped
1 bunch kale, chopped
1 tbs salt
1 tsp freshly ground black pepper
1/4 cup fresh dill, chopped finely
1 bunch scallions, chopped finely
1 cup nonfat greek yogurt, strained
1 cup creme fraiche (can get at whole foods or specialty markets)
1/2 cup goats milk feta, crumbled
1 egg, lightly beaten
1/2 stick unsalted butter, melted
1/2 cup extra virgin olive oil
1 egg + 1 tbs water, beaten (for egg wash)

Step 1: Preheat oven to 350 degrees fahrenheit. Heat a large pan to medium-high heat, add some olive oil, just to coat the bottom of the pan, add in your leeks and stir to coat for about 2 minutes, then garlic, for another 4-5 minutes until leeks are soft.

Step 2: Add in your kale, swiss chard, and spinach, season with the dill, scallions, salt and pepper (seems like a lot of salt, but its a lot of veg!) let cook down until soft, about 5 minutes. Line a bowl with paper towels and transfer the mixture to the bowl, cover with more paper towels and squeeze as much liquid as possible out.


Step 3: In a small bowl, combine yogurt, creme fraiche, feta, and the egg and stir to combine. Set aside.


Step 4: Time to assemble. Combine the melted butter and olive oil in a bowl. I use a square dish for this, using a pastry brush (or sauce brush, doesn't matter as long as its gentle) brush the bottom of the pan and begin to layer with phyllo dough. Be gentle, the dough tends to break and tear. I go length, brush the layer with the olive oil/butter mixture (center and edges) and then width, and repeat. After you have a good 10 layers, add your greens mixture.
 
Yes my hands look purple, I no not why. 

Step 5: Start to layer the top, and finish the package- alternating butter/olive oil mix in between layers. Cut off the edges (doesn't have to be perfect!! lets call it "rustic") Brush with egg wash and slit the center softly (don't pierce through to the greens)


Hi you baby dill!
Step 5: Place in the oven for approximately 1 hr and 15 minutes- some ovens are hotter than others, check out the top it should be brown and beautiful.


Let cool slightly, slice with a sharp knife, pair it with a nice acidic garden salad and you've got yourself warm happy tummy. ENJOY!


Wednesday, March 19, 2014

Salmon Teriyaki Stir Fry- BOOM!

You know those days when you are just glancing in your fridge… feeling totally uninspired. Grubhub.com is calling your name, Chinese…Pizza… ugh. It's cold, you're tired, but no… no not today sir. Today you will fix your posture, sit up tall and say NO! I will not order takeout when there are two delicious pieces of salmon wrapped up ready to be cooked sitting in your fridge. Don't worry lil guys, i'm gonna eatcha. Another annoying thing I faced when putting this together… pretty much half of my veggies in my fridge were bad. Great. Great? Well lets think outside of the box here. What do I need to make my teriyaki sauce? That jarred sauce is quietly calling to you… use me… use me… and although it is so easy to just plop it on and call it a day, take a look at the amount of sugar and sodium in that ish- no thank you. Heres what I need: low sodium tamari, water, honey, garlic, ginger, mirin (check and check) What veggies? Well, my onion isn't bad yet, or my red bell pepper… I've got some leftover broccoli florets from a crudite platter, and wait! and some scallions that have maybe a day left! There's NO greater satisfaction than cooking, even when you really don't want to, and creating a delicious and healthy meal knowing you were one step away from a grease-fest for dinner. This stir fry dish with some steamed brown rice (trader joe's frozen short grain brown rice is my go-to) and you are filled with sweet, savory, and scrumptious yumminess that won't make you feel bad about grabbing that scoop of ice cream for dessert ;-)

Teriyaki Salmon with Stir-Fried Veggies
2, 8 ounce wild salmon filets (one for me one for the hub)
1 tbs sesame oil
1 tbs minced garlic
1 tbs minced ginger
1/3 cup low sodium tamari
1/3 cup water
2 tbs mirin
2 tbs honey
1 red bell pepper, sliced thin
1 medium sized yellow onion, sliced thin
1 cup broccoli florets

Step 1: In a sauce pan over medium heat, add your sesame oil, then HALF of the ginger and garlic, sauté until golden (less than a minute.) Add  your tamari, mirin, honey, and a dash of salt and pepper, bring to a boil and reduce to a simmer for about 4 minutes. Let cool


Step 2: Once marinade is cooled, place HALF of it in a plastic bag with your salmon, make sure its coated. and pop it in the fridge for an hour or up to 3 hours. Reserve remaining marinade for veggies

Step 3: Set your oven to broil. Place the fish on a foil lined sheet, sprinkle with salt and pepper, and place in the oven- this may take as quickly as 5 minutes depending on the thickness of your fish, keep an eye on it. (Looking for spring-back)


Step 3: Get a wok nice and hot. Add a dash of sesame oil and the remaining garlic and ginger, cook for about 30 seconds, then add your broccoli, cook for 2 minutes, add red bell pepper and onions, cook for an additional 2 minutes and then add the rest of the marinade and cook until the liquid pretty much gone (about another minute)


Top with some sesame seeds, chopped scallions, your salmon and steamed brown rice- unreal meal.
ENJOY!


Thursday, March 13, 2014

Flexin' Mussels, Man.

I admit, I need to amp up my seafood consumption. It's not that I don't love it, I do, but seafood often is way more temperamental as far as a last minute decision to cook something. Especially shellfish. I LOVE shellfish, I mean… who doesn't? Unless you are deathly allergic I rarely stumble across someone who doesn't love a heaping bowl of piping hot mussels. Yum. Mussels are such a blank canvas, it's all about the broth, which is what I love about them. One night I can do spicy mussels with tomato and white wine, or creamy coconut milk and curry, but tonight I do one of my favorite renditions… fennel and white wine. Not only are they easy to make, they are quite impressive if I don't say so maself. Great for mass-feeding, a crunchy piece of garlicky toasted baguette for sopping up that amazing broth and nomnonom- you're ready to feast.

Mussels w/ Fennel and White Wine
1.5-2 lbs mussels
1/3 cup extra virgin olive oil
1 tsp red pepper flakes
2 large bulbs fennel, sliced thin (Using my trusty mandolin always does the trick, reserve the fronds)
2 leeks, sliced thin, soaked in water to remove sand!
3 cloves garlic, minced
2/3 cup Pernod
1 cup white wine (I use a Sauvignon Blanc here, but any wine you would drink with)
1/2 cup chicken stock (can use seafood stock, but chicken stock is easier to get)
1 tsp cane sugar
1 1/2 tsp salt
1 tsp freshly ground black pepper
1 bunch fresh thyme
1 bunch flat leaf parlsey


Step 1: In a large dutch oven (hehe) over medium heat, add the olive oil and red pepper flakes. Let sizzle for about a minute until fragrant. Add your fennel, stir to coat in the olive oil and sauté for about 5 minutes. Add the leeks for another 3 minutes, and then your garlic until all are translucent.


Step 2: Add your Pernod and white wine, crank up the heat a bit and let it reduce a little (about 3 minutes) add your stock, sugar, salt, pepper, fennel fronds, thyme, and parsley. Let cook for another 3-4 minutes.

Step 3: Debeard your mussels. Here my trusty prep cook and future husband Aaron was sent to do the job. Primarily because he's just so good at it! and I don't wanna do it! Add your mussels into the pot, cover and let steam for about 7-9 minutes just until they open.


Step 4: Remove the herbs, toast up yo bread, and dig in!
ENJOY!